


Table Of Contents
My day-job is developing and managing websites and e-commerce platforms, so I know the importance of stability and scalability on web platforms and technology in general. This is also true when working with my personal projects. For some time I have wanted to push my projects to the cloud so I can more easily utilize the scalability there. Also, I only have a laptop, and I don’t want a desktop computer to take space, collect dust, and consume power. Hardware also gets old and needs to be maintained. All those worries I would like to skip.
My goal is to setup a platform that will do a few things for me:
- Allow me to run my blog - this site
- Allow me to run my girlfriend’s blog - this site
- Be easy to update WordPress since it is known to have security issues in older versions
- Have good backup
- Alert me if/when the sites are down
- Alert me if/when the sites experience high load
- Protect the sites against DDoS and similar attacks
- Provide me with a coherent platform for all my projects both web and data analysis
- Be a learning platform for new technology in cloud computing
Lofty goals but I hope to setup a platform that will service me for many years.
Selecting a cloud platform provider and other technology
There are many providers to pick from, but based on hype I found that amazon’s cloud was the place most are talking about currently so I went there.
The signup process was pleasant and within 1 day I had my first virtual computer running. And even free for the first year. Right now the micro instance cost are around $5 / month.
I want to be as close to the technology that amazon provides but also try to be as vendor-agnostic as possible. For me, that means sticking to open source tools as far as possible. My reason for this is that if amazon ever gets too expensive or closes I want to be able to transfer my platform to another provider or my own hardware as easily as possible.
Lucky for me Amazon has support for docker so that made the choice for containerization tool easy. And other choices will be made along the way.
What I will cover in this series (hopefully)
When I started this series I had a lot of general knowledge about web, hosting, and computing in general. But I knew nothing about amazon’s systems or docker or any of the other tools that are needed to provide the platform I wanted to set up.
I knew how to install ubuntu, set up a web server, a database server, and get WordPress running on it, so far so good.
Many of the things I do along the way will probably be changed in later parts when learn more about the technology :-)
What is covered in this part
I want to have a WordPress setup for the two sites, with a backup of the database and any user-provided files. Plus any extra services I need to make this happen.
What we will do
- Setup an EC2 instance as a Docker host on Amazon
- Map out the infrastructure needed
- Build the docker-compose file to allow it to deploy
Sounds easy enough? :-) It took me about 24 hours spanning 3 days, of reading, scratching my head, trying different things to get to the first initial setup.
And I still see many problems with the setup, but they will hopefully be fixed later. Now the path is started.
Setup an EC2 instance with Docker on Amazon
I know that Amazon has “native” support for Docker through their Elastic Bean Stalk and Elastic Container Service, in time I hope to get to use them in this setup. But for now, I will run my own EC2 instance with docker installed.
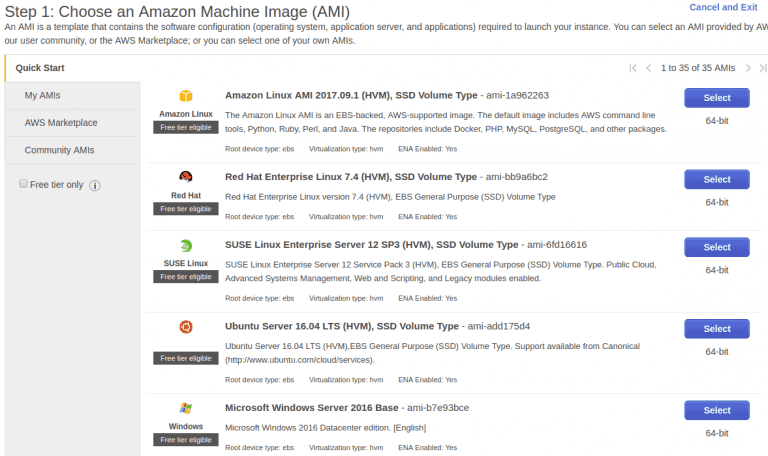
An EC2 instance is just a complete computer with its own OS, network access, and so on. When starting the instance just select the OS image you want to use and are familiar with. As shown below there are many to choose from.
I selected the ubuntu image since that’s what I’m running on my laptop, and are mostly used to working with.
After that you should be able to use ssh to get cli access to the server.
Then I installed docker using the official guide: Install docker
Because I want to be able to control docker from my own laptop I need access to the docker daemon, this is done through https. So this requires a certificate.
How to setup this is described in the official guide here: Remote access guide
This is where I hit my first gotcha. When booting an EC2 instance it gets assigned an IP and DNS name. This IP / hostname will change on reboot I found out :-)
When generating the encryption certificates I used the provided DNS which had the form, ec2-54-154-165-148.eu-west-1.compute.amazonaws.com when this changed after the reboot the certificates was useless.
This took me a while to figure out, so please configure an Elastic IP and set up your own DNS name to use in the certificate.
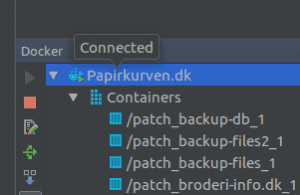
After this i could use the Docker integration in Phpstorm to access the remote docker installation. Then the fun could begin :-)
I was very happy to see this “Connected” info
Map of infrastructure
To get an idea of what we are going to set up I have made a diagram, mind you that this setup took a few hours of experimentation to flesh out. And I’m not quite happy with the setup, but I will detail that below.
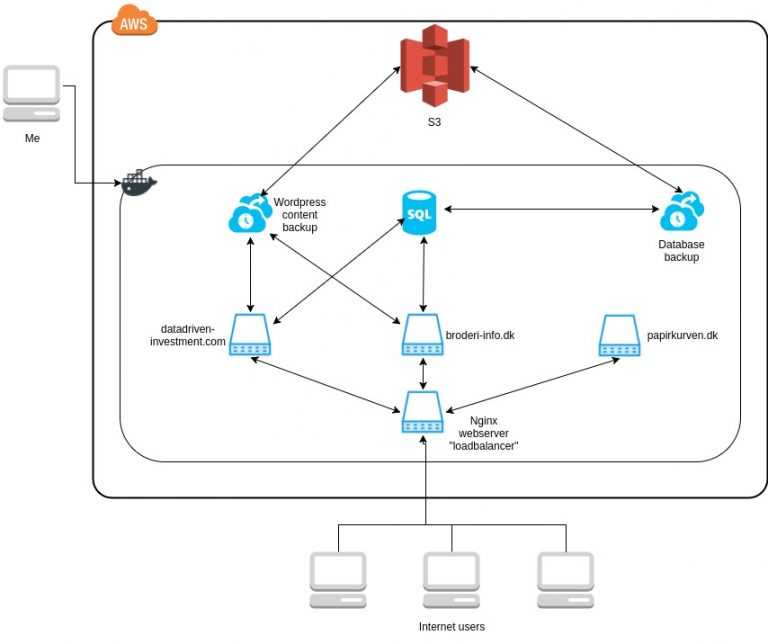
We have everything running on aws, with a single docker host running. Inside this docker host there are 7 instances running providing different services, every blue icon is it’s own operating system running as a docker instance.
This setup has many “problems” but it is an initial rough setup for me to learn docker. The setup serves web requests for three domains, datadriven-investment.com, broderi-info.dk and papirkurven.dk. The first two are wordpress sites, the last are a site with two files, just for testing purposes.
The dataflow is: every request from the internet hits the “loadbalancer”, then it proxy the request to the correct webserver above. The two wordpress webservers have connections to the SQL server.
Then there are the backup services, since stuff can go wrong I have chosen to backup to S3, which is an Amazon service for filestorage. Any other file storage should work, the backup servers just collects the data and pushes it to S3. I don’t intend it to have any autorecover features or similar, so it is only for manual disaster recovery.
Wordpress stores user installed plugins and uploaded images aso. in a wp-content folder. This folder needs to survive reboots of the containers, because of this the two wordpress sites has this folder mounted as a volume from the host machine. Same with the database, we want it to preserve the database data, so it also has a mounted volume from the host machine. This is also what allows the wordpress content backup server to mount the two volumes to make a backup.
Pros and Cons with this setup
I’m happy with to setup that is solves my initial requirement to make the three websites run and have backup. But anything further than that I’m not quite happy with.
- The “loadbalancer” is not really a loadbalancer, it just proxy the requests to the correct webserver hosting the domain. It would be more nice to have a setup where it actually is loadbalancing, since the three sites all run php and nginx, there is nothing preventing this.
- The backup services run continuously because a cron on the machines trigger the backup process. It would be nice to only start the machines when the backup service is needed and be powered off the rest of the time.
- There are no monitoring so if any of the containers stop I will not get any notification, and it will not startup on it’s own.
So many points to improve, but that is fine for now :-)
How to implement this infrastructure with docker compose
Now to the actual implementation.
First we need a docker-compose.yml file, this file gives us an overview of the infrastructure.
This is quite a mouth full and took me a while to figure everything out.
In the services part, we define the different containers, you will see that they correspond to each of the 7 containers in the diagram, loadbalancer, db, backup-db, backup-files, papirkurven, datadriven-investment and broderi-info. They are just names and it is the setup info inside each block that gives the “magic”.
There are two ways we define a container, using either the image: or the build: keyword. When using an image we just fetches the setup from someone else and uses that and settings some configs, like on backup-db and backup-files. There the image provides us with everything we need, so nothing needs to be customized.
We use build when a standard images does not cover our need. That could be because we need to add a config file to nginx or any other stuff that is not provided by the image. For example the loadbalancer uses the build keyword. I have added a zip file with the loadbalancer setup.
The build keyword makes docker compose look for a folder with the provided name, inside this folder should be a Dockerfile, which is the config file for building the image.
In this case we use FROM nginx:latest this means that instead of building an image from scratch we take the latest nginx build provided on hub.docker.com and adds extra stuff to it. In this case we copy using the ADD keyword the three config files from the subfolder conf.d to the conf.d folder inside the image.
Easy :-) and then docker compose can boot this container.
A few extra configurations are needed on the loadbalancer.
All the docker instances are running on their own internal subnet so connections from outside can’t reach the servers. To fix this we map a port, in this case nginx runs on port 8080 inside the container, but we need that to be accessible from port 80 on the host server. This is accomplish with the ports command.
Then we need the loadbalancer to have access to the webservers, this is done by the links command, which I think is legacy now so that needs to be changed later. The links keyword also signify dependency, so the webservers will be started before the loadbalancer.
Data persistence
This part had me puzzled for quite some time, because of wordpress. This gets a bit wordpress specific: I knew that i didn’t want to run each wordpress installation as a webhotel kind of setup, where each host is responsible for it’s own updating of wordpress. I want to manage wordpress code centrally so all the sites run the same the same version. One of the problems are that wordpress uses a local folder to save source code for plugins, themes, user uploaded files and so on, this folder is called wp-content.
So i want the core source code to be managed by me and the user content managed by the wordpress admin. I don’t think that the solution I have found now is optimal, but it will do.
For this to work I need a docker image with nginx, php-fpm and wordpress so it is selfcontained.
There exists a docker image that contains wordpress with php-fpm. And another image that contains nginx, but i didn’t find any image that contained both. This gave me the opportunity to try to build a custom image. The configuration are explained below. I mount the wp-content folder as a volume, so the backup server can access it and that it survives reboot of the container.
Wordpress docker image
The docker composer defines the datadriven-investment service like this:
datadriven-investment:links:- dbbuild: datadriven-investmentrestart: alwaysvolumes:- datadriven-investment-data:/var/www/html/wp-contentenvironment:- WORDPRESS_DB_HOST=db- WORDPRESS_DB_PASSWORD=xxxx- WORDPRESS_DB_NAME=datadriven_investment
First it needs access to the database, it also needs a volume for the wp-content folder. And the image uses environment variables to configure the connection to the database.
Also we need a Dockerfile to build the image:
FROM wordpress:fpm-alpineRUN apk add --update nginx && rm -rf /var/cache/apk/*;ADD ./conf.d/ /etc/nginx/conf.d/ADD ./nginx.conf /etc/nginx/ADD ./entrypoint.sh /usr/local/bin/ENTRYPOINT ["entrypoint.sh"]
As I explained above, I could not find an image which contained both wordpress, php-fpm and nginx. But it is easy to extend docker images. I start from the wordpress:fpm-alpine image, this image contains everything to setup wordpress and php-fpm on the linux distribution alpine.
Then i use the package software in alpine to install nginx. Then i copy the configfiles for nginx and a startup script. And last it starts running the startup script.
Next steps
For the next part I would like to implement true loadbalancing and only have two webservers to simplify the setup.
Share

Related Posts
Legal Stuff